Wednesday, December 9, 2015

Indigo Medallion: WIP Wednesday

I really ought to finish the boro quilt, but my own shibori indigo dyed fabrics have been calling for too long, and I couldn't resist starting the medallion quilt that's been on my mind for the past several months:


I dyed the center panel back in the summer, and I've been envisioning a medallion quilt ever since.  The center is an itajime variant that combines origami-like folding with clamped resists--it's sort of like folding and cutting paper snowflakes.  I used Osnaburg cotton, a fairly rough and loose weave of cotton, combined with a lot of massaging of the fabric while in the vat, in order to maximize dye penetration.  The rest of the fabrics come from both this summer's and last summer's indigo dyeing extravaganzas.


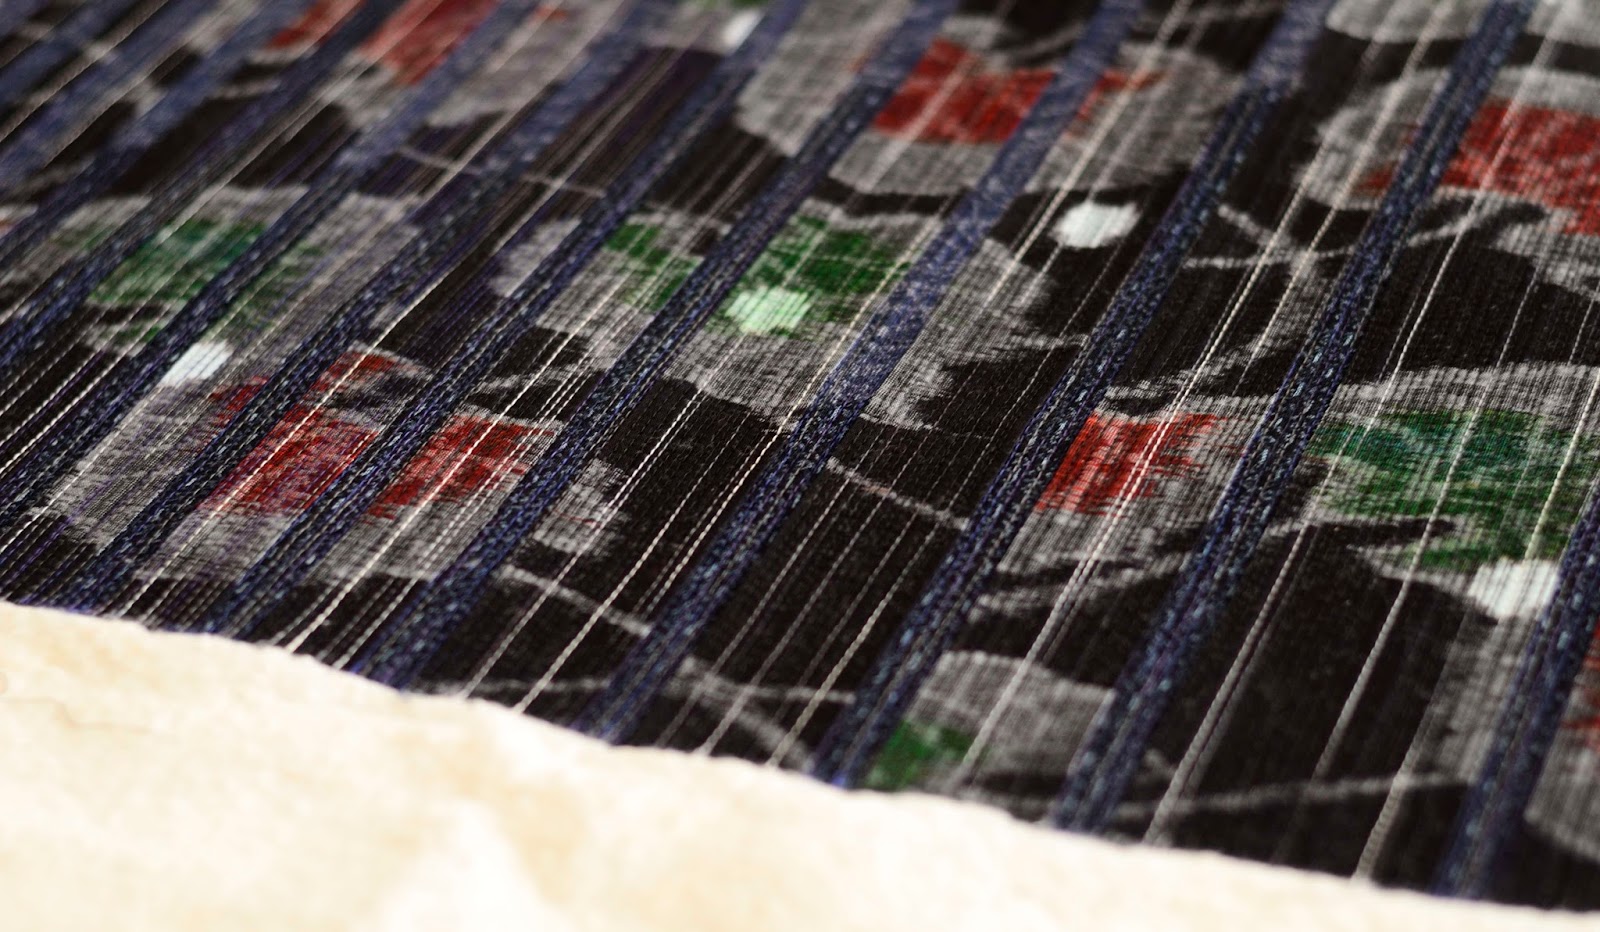
Currently, the top is about 28" square.  I don't know how many more rounds I'm going to do, but I'm guessing that it will finish at about 40-48" square.  Here's a hint of the next round, which will take me a while to put together:


Linking up to WIP Wednesday on The Needle and Thread Network and Freshly Pieced.  Happy sewing, everyone!

Wednesday, November 25, 2015

In the works

It's been quiet in my sewing room recently, so I can do a little more catching up in this post.  Back in mid-October, I went on a retreat for a fabulous weekend of sewing with some fellow VMQG members.  It was so much fun!   In addition to just gabbing away with fellow quilting fiends, I finally managed to make a name tag for myself, only five years after joining the guild, and I also contributed a block to a group quilt that's in progress.  But I spent most of my time working on the following:


It's the second in my new series of boro quilts.  Alas, I haven't worked on it since the retreat, but it's a high priority, and I will finish it soon.

A couple of weekends ago, I made another two indigo scarves for my Etsy shop:


Although it's pretty late in the day, I'm linking up to WIP Wednesday on The Needle and Thread Network and Freshly Pieced.  Hope all of your fiber-related adventures are happy ones, and for those of you in the U.S., happy turkey day tomorrow!

Wednesday, November 11, 2015

I'm still alive and sewing, really...

I've been lazy about taking photographs and blogging over the past several months, but that doesn't mean that I haven't been busy with textiles.  I did a lot more indigo dyeing beyond what I showed a few months back, and I've been working on various projects since September.

Over the past several months, I've admired the matchstick quilting that a lot of VMQG members have been doing lately, which beautifully transforms the texture of a quilt--it becomes almost like a woven wall hanging.  I had been waiting for the right project to try the technique myself, and when I happened upon some photos of Japanese boro patchworks online back in September, I knew I'd found the right inspiration.  Boro typically involves the use of old indigo-dyed cottons, which are given new life through patchwork and heavy quilting by hand to keep worn scraps together.  I decided to dig into my collection of Japanese cottons and use matchstick quilting to produce an updated, boro-inspired wall hanging:


I just love the results.  There was something wonderfully meditative about doing the matchstick quilting, which didn't bore me at all, and the visual effect from using two different variegated threads (40 wt YLI and 50 wt Mettler) is really eye-catching.  This quilt is the first of what will be a series of boro-inspired wall quilts.

VMQG was the "featured quilter" at the recent show of the Vancouver Quilt Guild, so our guild did a special "Modern Mini" challenge to showcase modern quilting: solids only, maximum 80" around, and an emphasis on modern techniques and designs.  The exhibit had about 26 quilts by guild members, including mine:


"Oakshott Lattice," another of my lattice quilts, features a repurposed classic block and an emphasis on graphic design that are both characteristic of "modern quilting."  The quilt ended up looking very Amish, thanks to the black and jewel-tone Oakshott shot cottons.  But that seems entirely appropriate, since the 1970s quilting revival grew in part from the modern art world's recognition of the powerful design qualities of Amish quilts.

More recently, I've started making scarves from my indigo-dyed gauze fabrics, so that I can add some much-needed inventory to my poor, neglected Etsy shop:


Finally, here's something on my design wall:


I'm not sure where it's going, but a dear friend gave me some gorgeous shibori dyed cottons from the grand old days of Kasuri Dyeworks in Berkeley, and I really, really want to work with them.

Linking up to WIP Wednesday on The Needle and Thread Network and Freshly Pieced.  Cheers!

Saturday, August 22, 2015

From the vat: Arashi and cotton gauze

I've been slow to post, but here are the remaining highlights from my first major round of dyeing this summer.  I did a little bit of pole wrapping, with narrow strips of fabric about 6-1/2" wide:


The piece on the right is more or less the same technique, but there's a way of twisting the fabric as you push it up the pole that produces the broken lines.  I haven't quite figured out how to do it consistently, but it's a nice effect.

Here's a little experiment, in which I pleated the fabric before winding it around the pole and wrapping it with string:


I was hoping for less white and more blue, but the result is interesting.

Finally, I dyed some cotton gauze in scarf lengths:


I love working with gauze, because it takes up the indigo so beautifully.  The first piece is tesuji, while the second is a non-traditional technique in which you wrap the fabric around a piece of string, and then pull the string tight so that the fabric is in a kind of ring-shaped scrunchy before it's dipped into the vat.  It's an easy, easy technique, with oh-so-pleasing results.

There's not much time left for me to dye this summer, but I still have more results to post.  Stay tuned!

Sunday, August 2, 2015

From the vat: Nui shibori

As I mentioned in a previous post, when I saw that my vat had reached optimal conditions, with the dark amber color that indicates well-reduced indigo at a reasonably high concentration, I reached for the pieces of stitched shibori laboriously prepped earlier.  After six rounds of dipping and oxidizing, I took a seam ripper and opened up the first piece, which was a small test piece about 6-1/2" wide meant to try out a design that came into my head:


I had three more pieces of nui shibori which I put through an additional four rounds of dipping and oxidizing before carefully undoing the stitching.  The results were thrilling.  First of all, here's my pride and joy, a selvage-to-selvage quarter-yard piece using a technique that I learned from Jane Callender last fall:


mokume close-up
another mokume close-up

I also love how this tatewaku pattern turned out:


Sorry not to offer a close-up.  My photo-editing program managed to eat up the image as I was editing it--a really strange glitch that I hope won't become a regular thing.

Mokume stripes on the diagonal also turned out well, although closer rows of stitching might have avoided some of the uneven breaks in the dyeing:


More to come!

Wednesday, July 22, 2015

Yes, I still remember how to quilt...

Although I haven't been in the blogosphere much lately, that doesn't mean I haven't been getting my hands dirty.  In addition to indigo dyeing, I've also been working on a bed quilt, which I started basting last night:


I'm tired of our ratty old Ikea duvet and decided that we ought to have a real quilt on our bed.  A couple months ago or so, I bought on sale a kit of Birchtree Lane fabrics, with their fun bird, leaf, and feather designs, which I supplemented with various tone-on-tone fabrics in whites and light browns.  I didn't make the actual quilt design of the kit, but did simple diamond-in-a-square blocks.  My sewing machine is headed to the shop for a thorough cleaning, and when it comes back, I will be ready to quilt!

Linking up to WIP Wednesday on Freshly Pieced and The Needle and Thread Network.  Happy sewing!

Monday, July 20, 2015

From the indigo vat: Solids

I'm always like to test the vat out by dyeing a range of solids:


From left to right, the six shades involved, respectively, 3, 4, 5, 8, 14, and 20(!) cycles of dipping and oxidizing. The 4- and 5-dip pieces were done separately from the rest of the lot, after I saw some final results and wanted to fill in a couple of gaps in the gradation.

The solids taught me a lot about the vat.  After the first half dozen dips or so, the fabrics didn't seem as if they were getting much darker, and at times I wondered if they were actually losing color.  Very frustrating!  But I kept going anyway, to see what would happen, especially after the vat reached a dark amber that made me think it just had to be working properly and adding more blue.  After I washed the final two pieces on the right, the true color underneath was significantly darker.  Somehow, the zinc-lime vat seems to leave a lot of unreduced indigo on the surface of the fabric, which later washes out and reveals some happy surprises.

At the same time, I was able to get to dark shades more quickly with last year's thiox vat.  The 20-dip piece on the far right isn't really any darker than a good dark blue that I got after about eight dips last summer.  In the workshop that I took last fall, Gasali Adeyemo says that he gets a dark blue in just 3-8 dips, which suggests that if I want really dark blues, I can be much braver about using a heck of a lot more indigo than most of the standard vat recipes suggest.  I tried to look up the maximum solubility of indigo in an alkaline environment, but no luck thus far in getting that particular chemical statistic.

I also can't honestly say that the blues from the zinc-lime vat are significantly different from the ones from last year's thiox vat.  Maybe the difference in tone from the Japanese fabrics in my collection comes from the indigo?  Or something else in the vat chemistry?  I wish I had some Japanese indigo that I could try, for purposes of comparison.  If anyone wants to bring me some natural indigo from Japan, derived from polygonum tinctorium, please feel free to do so!  Or if you want to grow it yourself and ferment it for me, I will happily try it out!

Saturday, July 18, 2015

Indigo 2015: The vat

I've been lazy about blogging, but I've been busy with this summer's indigo dyeing.  This year I'm trying a zinc-lime vat, which takes time to set up, but is supposed to produce deeper, richer blues than the thiox vat.  In mid-June, I prepared my first stock solution:


The stock looked really good after five hours of reduction--the dark amber color was just what it's supposed to be, and there was a good, thick layer of  indigo "flower" with a nice bronze sheen on top.

This vat uses zinc as a reducing agent in combination with calcium hydroxide (lime).  Although the zinc-lime vat has a reputation for being a bit tricky to manage, it has a number of advantages in addition to the colors that it produces.  It reduces indigo efficiently, works at room temperature down to about 60 Fahrenheit, and can be revived even after months of non-use.  Unfortunately, as I noted in an addendum to a previous post, the zinc is rated as a hazard for aquatic life, so the vat has to be disposed of properly as hazardous waste and can't be poured down the drain.  In the longer term, if I want a room temperature vat, I'll have to switch to a ferrous sulfate vat.  It doesn't have the efficiency and longevity of the zinc-lime vat, but is better for the environment (at least as far as anyone knows at the moment).

I had difficulty with the vat for the first several days.  Various dyeing guides talk about looking for a "French mustard" color or a color ranging from yellow to dark amber, depending upon the amount of indigo in the vat.  I thought I had a vat on the yellow-ish side when I first started dipping, but after several rounds, I didn't seem to be building additional color, and my first fabrics weren't very well dyed.  In retrospect, I think the vat was too green and the indigo wasn't reduced enough.  The initial vat also didn't stay chemically balanced as long as I thought it would, and when I went away for a weekend after the first few days of dipping, the vat died completely.  I fiddled with sharpening the vat by adding various combinations of additional zinc, lime, and indigo, and eventually, after about ten days after the original stock solution, I got the following result:


At this point, the vat seemed very bubbly and lively, with lots of dark blue "flower," flecked with bronzy blue bits.  The vat liquid itself reached a perfect dark amber, and I felt certain it was just right.  I immediately started dyeing some elaborate nui shibori pieces that I had laboriously stitched and tied a while back, but didn't dare dye until I felt confident about the vat.

I'll discuss the results of my initial round of dyeing in the next few posts.  Indigo Summer 2015 is well underway!

Tuesday, June 2, 2015

Bleach discharge dyeing

Yes, it has been a while.  The day job took me away from home for all of March and April, and I was too lazy to do anything on-line in May.  But my quilt "Indigo Summer" is in Lethbridge for this year's National Juried Show, plus I've been quilting and dyeing, and I'm getting ready to get back to the indigo vat later this month.  In the meantime, I saw an article on bleach discharge dyeing with shibori techniques in the most recent issue of The Canadian Quilter.  It sounded fun and easy, so I decided to give it a try this past weekend.  On Saturday and on Sunday morning, I worked on prepping fabrics, and then I spent Sunday afternoon in the backyard:

prep work in progress
discharged fabric in the neutralizing solution
I used black, dark brown, and dark blue Kona cottons.  After bleaching, the black fabric turned a nice shade of brown, while the blue produced a plummy pink, and the brown became reddish orange.  I used a range of techniques, including pole-wrapping, tesuji, stitched shibori, and itajime.  Here are some of the results:


Not bad, huh?  The colors don't have the depth, richness, and sophistication of indigo, but bleach discharge dyeing is quick, easy, and still very satisfying.  If you want to try dyeing with a process that isn't too fussy or difficult, bleach discharge is a great technique--I highly recommend giving it a shot!

6/3: Linking up to WIP Wednesday at Freshly Pieced and The Needle and Thread Network.  Cheers!

Wednesday, February 4, 2015

WIP Wednesday: Log Cabin quilt

Apologies for the lousy photo--the lighting is really atrocious today, and the weather is not expected to improve for at least another week, but I still wanted to do a quick WIP Wednesday post.  I was out of town for four days and didn't actually make any progress last week, so what you're seeing are the four blocks (minus a couple of strips) that have been waiting around for the past week:


The colors are really a lot more attractive in person, although the green and blue are both of a certain range of darker shades that make them hard to distinguish in low light.  I think the greens were some kind of yellow that was overdyed with indigo, which would explain why they tend to blend so easily with the blues.

Next I get to start piecing green and brown blocks and see what results!

Linking up to WIP Wednesday on Freshly Pieced and The Needle and Thread Network.  Happy sewing!

Wednesday, January 28, 2015

Finished! "Indigo Summer"

"Indigo Summer" is finished, binding and all:


I loved every moment of making "Indigo Summer," from the dyeing of the fabrics, to the improvised piecing, to the hand-quilting, and then, finally, the faced binding.  It's quite a stunning quilt, if I do say so myself.  I'm thinking of entering it in the National Juried Show of Quilt Canada 2015, although I haven't quite decided whether or not to face the nervousness of putting the quilt into the mail.

I took the photos with my snazzy new 50mm lens.  This lens avoids the curved distortion on the edges that comes with my telephoto, plus the large aperture (to f1.8) allows photos in lower light conditions.  Definitely a good addition to the camera bag, especially if I start to enter shows on a regular basis.

I also made progress on the log cabin quilt this week.  No photos, alas, but I'm just about finished with the fourth block, and I'll try to have pictures next week.

Linking up to WIP Wednesday on Freshly Pieced and The Needle and Thread Network.  Happy quilting!

1/30: Now linked up to Finish it Up Friday on Crazy Mom Quilts, Link-A-Finish Friday at Richard and Tanya Quilts, and Off the Wall Friday at Creations...Quilts, Art....Whatever.  Cheers!

Tuesday, January 20, 2015

What comes next?

I've just about finished the indigo quilt (photos to come), so the question was, "What comes next?"  I have all sorts of plans for other quilts with indigo dyed fabrics, and also quilts without indigo dyed fabrics, not to mention plenty of UFOs.  Did I decide to work on any of them?

Why do that, when I can pursue yet another idea?  On Sunday, while I was poking around in the Maiwa Supply store on Granville Island, I started rummaging around in the scrap bin there.  Now, I'm supposed to be on a fabric embargo, since I already have more than enough fabric to quilt for the rest of my life.  But as with any embargo, a little smuggling gets through here and there. 

In the Maiwa scrap bin, I found long strips of beautifully dyed, mostly solid cotton fabric, and I immediately thought, "Log Cabin quilt!"  I figured I could fill a small paper bag ($3) with these scraps, take them home, and just see what I could make from them.  Of course, I kept pulling out fabrics and digging down to the bottom of the barrel, literally, and in the end had to get a medium bag ($6).

The bag wasn't actually that large, but it weighed close to five pounds, and after I ran the fabrics through the dryer to remove some lint, I had an enormous pile.  I folded and sorted everything to see what I had:


Although there are only about seven or eight main colors, there are lots of subtle differences.  For example, I think the dark browns amount to five or six different shades.  Since all of the cottons are dyed with natural dyes, they also go together beautifully.

But what kind of log cabin quilt to make?  I want to try for something understated and sophisticated, in which the quiet differences in tone will add up to a powerful visual effect.  I looked at a lot of photos of quilts by Emiko Toda Loeb and Shizuko Kuroha, two quilters whose work I've admired over the years, for inspiration.  Both of them incorporate a lot of traditional Japanese aizome (indigo dyed) cottons into their work, and Kuroha's indigo quilts have a particularly wonderful luminosity to them.

I had originally thought I would use only the Maiwa fabrics, but I settled on a log cabin block with a large center cut from my own shibori indigo dyes.  Here's the first block:


Will this work, or will it just be kind of boring and monotonous?  We shall see!

Linking up to WIP Wednesday on Freshly Pieced and The Needle and Thread Network.  Cheers!

Saturday, January 3, 2015

2014: The Year in Indigo


For me, 2014 was an incredibly exciting year of exploration into the possibilities of indigo dyeing.  Here's what I learned by experimenting in my outdoor "dye studio" during the late spring and summer: 

1)  how to set up and manage a thiox vat

2)  improved dipping technique: how to work the fabric to promote even dye penetration, a particularly important issue when trying to dye solids

3)  the properties of different fibers and how they take up indigo: Kona PFD, Essex linen, cotton gauze

4)  the possibilities of different shibori techniques: itajime (clamp resist), nui (stitched) shibori (especially shirokage, or white shadow shibori, which I think is a particularly exciting technique), kumo (spiderweb) shibori, and arashi and bomaki (two different pole-wrapping techniques) 

I was sad to put away the dyeing supplies in the fall, but two Maiwa workshops helped with my indigo withdrawal.  Jane Callender helped me to refine some of my stitching techniques, as well as to try Procion dyes for the first time.  Gasali Adeyemo provided an introduction to Yoruba techniques, along with major insights about the indigo vat.  I also started quilt-making with the fabrics that I dyed during the summer, which will give me the needed indigo fix throughout the winter.

What's up for 2015?  A big project at the day job will require much more of my focus, so this year's indigo dyeing probably won't be as intense as last year's.  I do have some goals, however.

1)  First and foremost, I want to try a zinc-lime vat.  The zinc-lime vat offers the advantage of working at low temperatures (down to 60 Fahrenheit) and relative ease of building to dark shades, with minimal waste of indigo.  It has fallen somewhat out of favor (at least in the U.S. and Canada--I still see quite a few British dyers using the zinc-lime vat) due to disposal issues.  A chemist friend tells me that the real problem is less the zinc itself, however, than cadmium, and as long as I use highly pure zinc, disposal won't be an issue.*

2)  More complex arashi techniques and patterns are on the agenda as well.   I love pole-wrapping, and I've only tried the most basic possibilities thus far.

3)  I splurged and purchased a special shibori tool so that I can try more intricate knotting techniques.  It's still slow going, but I'll see how much prep work I can manage of FQs this winter.

4)  I'm not sure I'll have time to explore capping (a method for resisting large areas of fabric), but I've seen so many beautiful samples that require this technique, and I'd like to try it someday.

5)  I really, really want to try katazome dyeing, although I don't know if 2015 will be the year.  I see that John Marshall will be holding a 3-day workshop in Eugene, Oregon in June, which is highly tempting, but the trip might put too big a dent in my budget.  If I'm lucky, perhaps Maiwa will have a katazome workshop that will fit my schedule. 

Happy New Year!


*update on 6/16/2015: I looked up the MSDS information on zinc, and the issue is not the cadmium, abut the zinc itself, which is dangerous for aquatic life.  I had hoped once the zinc oxidized it wouldn't be a problem, but zinc oxide is also rated as an environmental threat to aquatic life.  If you decide to try a zinc-lime vat, you must not pour it down the drain, but instead, let the water evaporate, and dispose of the solid residues properly through a hazardous waste facility.